Comprehensive Guide to PC Engines APU2 - Part 2 (Firmware)

Update 2021: No longer recommended due to shortage. https://www.pcengines.ch/leadtime.htm "Due to an extended shortage for the NICs used on our boards, we will not be able to make regular deliveries in the next few months. The lead time for new NIC orders is quoted around 52 weeks."
I will only be covering commands for Linux, more specifically Ubuntu as the host machine. But the underlying concepts do apply for all platforms.
Connecting to the Board
After assembly is done, let's test the board to make sure it's working.
Connect the serial cable to your computer, and the power cable to a power socket, but do not turn it on yet.
To avoid arcing (small sparks) on the DC jack, please plug in the DC jack first, then plug the AC adapter into mains.
Identify Device File
Use the following command to identify your serial device file, mine is /dev/ttyUSB0.
$ sudo dmesg | grep 'tty'
[    0.129528] printk: console [tty0] enabled
[    2.860265] 00:04: ttyS0 at I/O 0x3f8 (irq = 4, base_baud = 115200) is a 16550A
[   19.596717] usb 5-3: cp210x converter now attached to ttyUSB0
Add Permission
To connect over serial from your Linux machine, your current user needs to be in the dialout group. You can do so with the following commands.
$ sudo usermod -aG dialout $USER
$ newgrp dialout
If you are curious how that was derived, here's the explanation.
First, let's check the device file permission with the following command,
$ ls -l /dev/ttyUSB0
crw-rw---- 1 root dialout 188, 0 Jan  1 00:00 /dev/ttyUSB0
crw-rw----
The first character c indicates it's a Character device, which means the driver communicates by sending and receiving single characters. The other possible device file category is Block.
Next are the permissions for owner, group, and public. And we see that read/write permission is granted only to the owner and group. Refer to image below for detailed explanation.
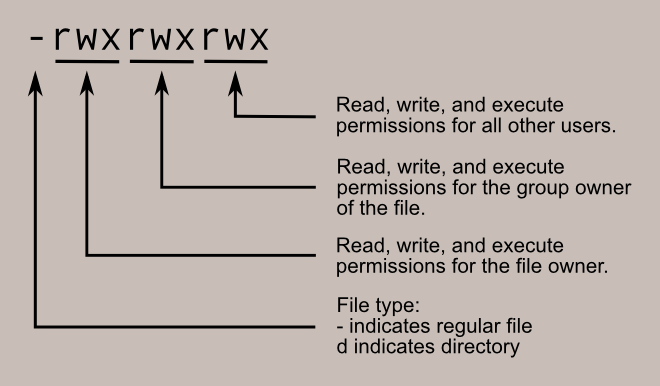
root dialout
The file owner is root and the group name is dialout. I prefer to set proper permissions instead of using sudo, which is why I have added the current user to the dialout group.
Serial Connection
I will be using PuTTY in this guide because it's cross-platform. Install it with the following command if you don't have it installed.
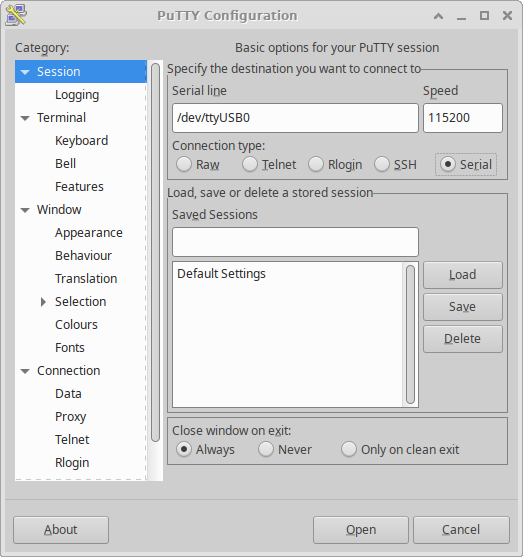
$ sudo apt install puttyStart PuTTY, and select serial connection type.
For Serial line, use your device file path, mine is /dev/ttyUSB0.
For the speed, use 115200. (This value is documented in official pages, links provided at the end of this section).
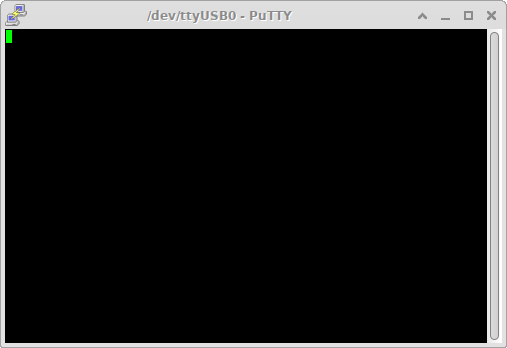
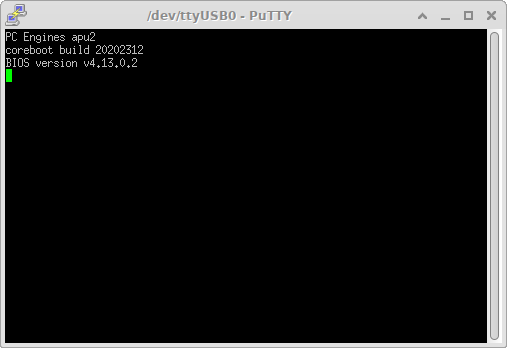
You should see a blank screen (as shown below), now you can power on the board.
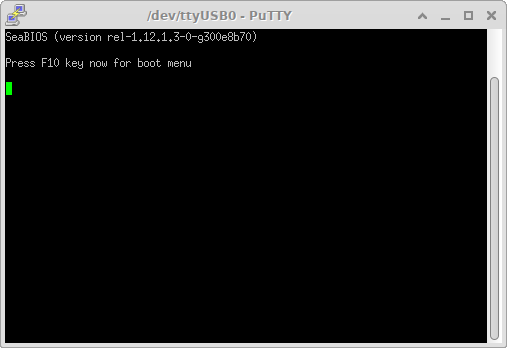
After being powered on, you will see some boot information, and it might enter into Memtest86+ if no user input was detected. You can leave it running or turn it off.
Here are some extra information about the serial console from the official site, if you want to take a look.
https://www.pcengines.ch/ht_com.htm
https://pcengines.ch/howto.htm#serialconsole
Updating the Firmware
After you have verified that your board is working, the next step is to update the firmware to the latest version.
It's possible to update the firmware from within OPNsense, but I prefer to update it before doing any installation.
Here's an overview of steps involved.
-
Obtain the firmware file, either by downloading or building from the source code.
-
Download PC Engines' customised vesion of Tiny Core Linux and copy it to a boot media. Copy the firmware file onto it as well.
-
Boot from the boot media and flash the new firmware
Downloading and Verifying the Firmware
This is the official page for the firmware releases, https://pcengines.github.io
Here are the step-by-step instructions to download and verify the firmware file for Linux.
The verification process is optional, so you can simply just download the firmware file if you don't want to do any verification. But it's good practice to at least verify the checksum to confirm that the downloaded file isn't corrupted.
- Create a working directory, and switch to it.
I am just going to call it "working", you can name it whatever you like.
$ mkdir working && cd $_Or for zsh users
$ take working- Download the zip version of the firmware files.
$ wget https://3mdeb.com/open-source-firmware/pcengines/apu2/apu2_v4.13.0.2.zipThis is just an example, please replace the url with the one you need. You can find them from the official firmware release page.
- Unzip files into current working directory
$ unzip apu2_v4.13.0.2.zip
- Verify SHA256 checksum
$ sha256sum -c ./apu2_v4.13.0.2.SHA256or a longer version just for fun
$ diff -s <(sha256sum apu2_v4.13.0.2.rom) <(cat apu2_v4.13.0.2.SHA256)By default, the diff command doesn't print anything when both inputs are identical, so I have added the -s flag, shorthand for --report-identical-files to make it display some output as explicit confirmation that both are identical.
- Verify GPG Signature
There is a .sig file in the zip archive so let's verify that as well.
We will need the public key which can be found here, https://github.com/3mdeb/3mdeb-secpack/tree/master/customer-keys/pcengines/release-keys
First, import the public key into your keyring
$ wget https://raw.githubusercontent.com/3mdeb/3mdeb-secpack/master/customer-keys/pcengines/release-keys/pcengines-open-source-firmware-release-4.13-keys.asc
$ gpg --import pcengines-open-source-firmware-release-4.13-keys.asc
After the public key is imported, we will be able to verify the signature
$ gpg --verify apu2_v4.13.0.2.SHA256.sig apu2_v4.13.0.2.SHA256
Building the Firmware (Optional)
You can also build the firmware yourself from the source code. It's not as intimidating as it sounds, and is actually quite a straightforward process thanks to the firmware builder tool provided by PC Engines.
Here is the link to the tool's project page, https://github.com/pcengines/pce-fw-builder
You are required to know some basic git. If you are new to it, please install and read up on your own. It's a must know for anyone interested to work with source codes.
You will need docker to run the tool. Official installation guide is here if you need it, https://docs.docker.com/engine/install/
After installing docker, you will also need to add your current user to the docker group.
If you already have docker installed, please check that your current user is in the docker group with the groups command.
$ groupsIt should display a list of groups that your current user belongs to, and if you don't see docker you will have to follow the instructions below too.
Use these two commands to create the docker group and add the current user to it.
$ sudo groupadd docker
$ sudo usermod -aG docker $USER
For changes to take effect, either logout and log back in again or use the following command to activate the changes immediately.
$ newgrp docker
- Create a RAM disk (optional)
I prefer to work with a RAM disk because it's way faster than an SSD, and I have tons of free RAM anyway.
You can check how much free RAM you have currently with this command.
$ free -gThe -g flag tells it to display the results in GB, you can also use -m if you want it in MB,
If you have RAM to spare, you can create a RAMdisk with the following commands
$ sudo mkdir /mnt/ramdisk
$ sudo mount -o size=4G -t tmpfs none /mnt/ramdisk
I am setting it to 4GB, just an arbitrary number which is more than enough. 1GB will be insufficient and you probably need at least 2GB.
The mount command will just mount the RAM disk temporarily until reboot. To have the RAM disk mounted automatically on boot, you will have to add the entry to your /etc/fstab file. Note that this is a RAM disk, so data will be cleared after power down/reboot.
- Set working directory
$ cd /mnt/ramdiskI am using my RAM disk, use whatever suits you.
- Clone the firmware builder project
$ git clone https://github.com/pcengines/pce-fw-builder.git
$ cd pce-fw-builder- Run the build command
$ ./build.sh release v4.13.0.2 apu2For the version number, I am referencing from the firmware download page.
Below is the output I got after the build process was completed successfully. Checksum is identical to the downloaded firmware file, so I can be assured that the firmware file wasn't tampered with.
Built pcengines/apu2 (apu2)
86b1d2c9913cdf2ae31cf73f19dd856eba2b9f957a90d6ff1e79fde6f772fb3e  apu2_v4.13.0.2.rom
Flashing the Firmware
Now that we are satisfied with the firmware file, it's time to flash it onto the device. There are many ways to do this, and I will be showing you how to do it using the PC Engines' customised version of Tiny Core Linux.
First, let's download and decompress the boot image.
$ wget https://pcengines.ch/file/apu2-tinycore6.4.img.gz
$ gzip -d apu2-tinycore6.4.img.gz
No checksum is provided, so I will share mine for reference.
f5a20eeb01dfea438836e48cb15a18c5780194fed6bf21564fc7c894a1ac06d7 apu2-tinycore6.4.imgNext, copy it to a bootable storage media.
If your board is still using the original firmware, v4.0.7, then USB 3.0 thumb drives probably won't work so you have to use either a USB 2.0 thumb drive or an SD card.
You can use Etcher if you prefer to use a GUI, it's cross-platform too. Or if you want to use the command line, here are the steps.
Identify the device file for your drive with the following command
$ lsblkMine is /dev/sdb but I will be using /dev/sdz in this guide, because z is an extremely rare drive letter, and the command will likely fail if anyone just copy and paste the commands without changing. This is to prevent them from accidentally wiping their drives.
Unmount if it's mounted.
$ sudo umount /dev/sdz*dd is a dangerous and irreversible operation so make sure you get the device file right.
Copy the boot image to your bootable storage device with the dd command
$ sudo dd bs=1M if=apu2-tinycore6.4.img of=/dev/sdz status=progressAfter it's done, copy the firmware image to the storage device's root directory.
$ cp apu2_v4.13.0.2.rom [root directory of your mounted drive]
Next, unmount and eject your storage media with the following commands. Then remove it and the insert it into your device.
$ udisksctl unmount -b /dev/sdz1
$ udisksctl power-off -b /dev/sdz
Connect to the serial console, you can use PuTTY with the instructions covered earlier.
Once you have it connected, turn on the device. When it says "Press F10 key now for boot menu", press it and choose your boot device to boot into Tiny Core.
After Tiny Core is loaded, check the current bios version using the following command.
root@box:/# dmidecode -s bios-version
4.0.7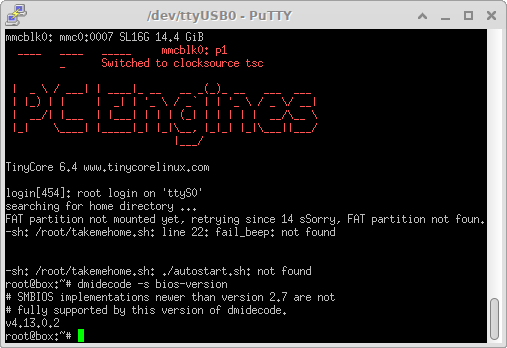
Your boot device root directory should be mounted on /media/SYSLINUX/ and you can use the following command to flash your new firmware image to the board.
root@box:/# flashrom -w /media/SYSLINUX/apu2_v4.13.0.2.rom -p internalIf your boot device root directory isn't mounted automatically, you can mount it manually. I encountered this problem when using an SD card, so here's the command to mount and rectify this issue.
Please modify accordingly for your own needs, you might also need to create the mount point if it doesn't exist.
root@box:/# mount /dev/mmcblk0p1 /mnt/mmcblk0p1If you are upgrading from pre-v4.6.7 in mainline or pre-v4.0.15 in legacy, you will see the following error message. This is because the part number entry has been shortened to "PCEngines apu2" from "PC Engines:PCEngines apu2".
Calibrating delay loop... OK.
coreboot table found at 0xdffae000.
Found chipset "AMD FCH".
Enabling flash write... OK.
Found Winbond flash chip "W25Q64.V" (8192 kB, SPI) mapped at physical address 0xff800000.
This coreboot image (PC Engines:apu2) does not appear to
be correct for the detected mainboard (PC Engines:PCEngines apu2).
Aborting. You can override this with -p internal:boardmismatch=force.
After you have double-checked that you are using the right firmware, you can use the "-p internal:boardmismatch=force" flag to bypass the warning.
root@box:/# flashrom -w /media/SYSLINUX/apu2_v4.13.0.2.rom -p internal:boardmismatch=forceflashrom v0.9.8-r1888 on Linux 3.16.6-tinycore (i686)
flashrom is free software, get the source code at http://www.flashrom.org
Calibrating delay loop... delay loop is unreliable, trying to continue OK.
coreboot table found at 0xdffae000.
Found chipset "AMD FCH".
Enabling flash write... OK.
Found Winbond flash chip "W25Q64.V" (8192 kB, SPI) mapped at physical address 0xff800000.
This coreboot image (PC Engines:apu2) does not appear to
be correct for the detected mainboard (PC Engines:PCEngines apu2).
Proceeding anyway because user forced us to.
Reading old flash chip contents... done.
Erasing and writing flash chip... Erase/write done.
Verifying flash... VERIFIED.A full power cycle is required after flashing. I prefer to use the poweroff, then switch it off then on.
root@box:/# poweroffWhen the system is booted up again, it should show the new bios version. So, congratulations, you have successfully updated the bios and now you are ready to install the OS/firewall.
For reference, here is the official documentation page on firmware flashing, https://github.com/pcengines/apu2-documentation/blob/master/docs/firmware_flashing.md